Stealth Cam Deceptor Manual: A Comprehensive Guide (Updated 03/31/2026)
This manual details the Deceptor MAX, a 40MP/1440P QHD camera with dual SIM capability and a Sol-Pak solar pack, offering setup, operation, and troubleshooting guidance.
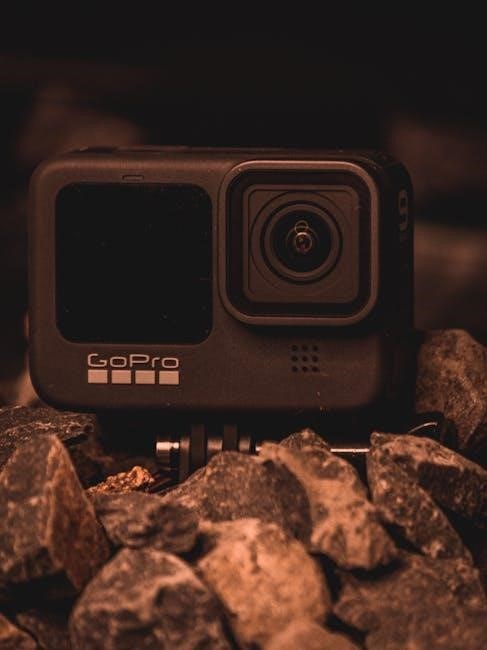
Welcome to the world of advanced wildlife observation with the Stealth Cam Deceptor! This cutting-edge trail camera is engineered for hunters, researchers, and anyone passionate about remotely monitoring wildlife activity. The Deceptor series, particularly the MAX model, boasts exceptional 40MP image resolution and stunning 1440P QHD video clarity.
This comprehensive manual will guide you through every aspect of your camera, from initial setup and configuration to advanced customization and troubleshooting. It covers the integrated Sol-Pak solar charging system, ensuring extended deployment periods. Understanding its features will unlock its full potential, providing invaluable insights into the natural world around you.
Understanding Deceptor MAX vs. Standard Models
The Stealth Cam Deceptor MAX distinguishes itself through key enhancements over standard Deceptor models. Primarily, the MAX features dual SIM card slots, providing increased cellular network flexibility and redundancy for reliable data transmission. It also boasts a higher megapixel count – 40MP versus the standard model’s resolution – resulting in significantly sharper images and videos.
Furthermore, the MAX is optimized for extended battery life, especially when paired with the Sol-Pak solar charger. While both models offer similar core functionality, the MAX delivers a superior user experience for those demanding top-tier performance and reliability in remote monitoring applications.
Key Features of the Deceptor Series
The Stealth Cam Deceptor series excels with its No-Glo LED technology, ensuring covert operation without spooking wildlife. High-resolution imaging, up to 40MP in the MAX model, captures exceptional detail. Rapid trigger speeds minimize missed action, while extended flash ranges illuminate distant subjects.
Cellular connectivity, including dual SIM options on the MAX, enables remote image and video access. The series is also compatible with the Sol-Pak solar charger for prolonged, off-grid operation. User-adjustable PIR sensitivity and customizable settings provide tailored surveillance solutions.
Camera Overview & Components
The Stealth Cam Deceptor features a rugged, weather-resistant housing protecting internal components. Key elements include a high-resolution lens for clear image capture, a control panel for navigating settings, and a built-in color display for reviewing photos and videos.
A Passive Infrared (PIR) sensor detects motion, triggering the camera. The unit accommodates both SIM and SD cards for cellular transmission and local storage. The Sol-Pak solar battery pack connects externally, providing supplemental power. Strap slots facilitate secure mounting to trees or posts.
Identifying Parts: Housing, Lens, Control Panel
The Deceptor’s housing is constructed from durable, weather-resistant material, safeguarding internal components. Locate the high-quality lens, responsible for capturing images and videos; ensure it remains clean for optimal clarity.
The control panel, typically found on the camera’s side or bottom, features buttons for menu navigation and setting adjustments. Familiarize yourself with these controls for efficient operation. A strap slot on the rear housing allows for secure mounting. A nut and washer are used to tighten the strap for stability.
The Sol-Pak Solar Battery Pack significantly extends the Deceptor’s operational life, reducing the need for frequent battery changes. This pack harnesses solar energy to recharge the camera’s batteries, ideal for remote locations.
It’s designed for seamless integration with the Deceptor series, providing a sustainable power source. Understanding its operation is crucial for maximizing camera uptime. Proper placement and sunlight exposure are key to efficient charging, especially during winter months when sunlight is limited.
Initial Setup & Configuration
Before deploying your Stealth Cam Deceptor, proper initial setup is essential. This involves physically preparing the camera and configuring its basic settings. Begin by ensuring the camera is powered off during SIM and SD card insertion.
Once powered on, the date and time must be accurately set for correct image and video timestamps. Familiarize yourself with the control panel to navigate the menu system. Careful configuration at this stage ensures optimal performance and reliable data capture in the field.
Inserting SIM Card & SD Card
To insert the SIM card and SD card, ensure the camera is powered OFF. Locate the SIM and SD card slots, typically found within the camera housing. Gently insert the SIM card into its designated slot, ensuring proper orientation.
Next, insert the SD card into its slot, listening for a click to confirm secure placement. These cards are crucial for storing captured images and videos, and for cellular data transmission. Verify compatibility with the camera’s specifications before use.
Powering On & Initial Date/Time Settings
After inserting the SIM and SD cards, power on the Stealth Cam Deceptor. The camera will initiate a startup sequence. Upon powering on, the first crucial step is setting the correct date and time. Access the settings menu using the control panel buttons.
Accurate date and time stamping is vital for organizing and analyzing captured data. Navigate to the date/time settings and input the current information. Confirm your entries to ensure proper functionality and accurate data logging for future review.
Camera Mode Selection (Photo, Video, Hybrid)
The Stealth Cam Deceptor offers versatile capture modes: Photo, Video, and Hybrid. Photo mode captures still images, ideal for quick snapshots and identifying wildlife. Video mode records moving subjects, providing detailed observation. Hybrid mode intelligently combines both, capturing photos while simultaneously recording video clips.
Select the desired mode through the camera’s control panel. Consider your monitoring goals when choosing a mode. Hybrid mode maximizes data collection, while Photo mode conserves SD card space. Experiment with each setting to determine the best fit for your specific needs.
Advanced Settings & Customization
The Deceptor’s advanced settings allow for tailored operation. Customize PIR coverage distance to focus detection on specific areas, minimizing false triggers. Adjust trigger speed and recovery time for optimal responsiveness – faster speeds capture quicker movements, while longer recovery times conserve battery life.
Further customization includes image resolution and video quality settings. Explore options for date/time stamping and camera naming. These settings enhance data organization and analysis. Experiment to find the perfect balance between image clarity, file size, and battery consumption.
PIR (Passive Infrared) Sensor Adjustment
The Stealth Cam Deceptor features a variable PIR distance, crucial for optimizing detection range. Adjusting the PIR sensitivity allows users to fine-tune the camera’s responsiveness to movement. A shorter distance focuses on nearby activity, reducing false triggers from distant sources like swaying branches.
Conversely, a longer distance expands the detection zone, ideal for larger areas. Proper adjustment minimizes wasted battery power and ensures relevant footage is captured. Experiment with different settings based on the surrounding environment and anticipated wildlife patterns.

Trigger Speed & Recovery Time Optimization
Optimizing trigger speed and recovery time is vital for capturing clear images of fast-moving wildlife. A faster trigger speed ensures the camera activates quickly upon detecting motion, minimizing the chance of missing crucial moments. However, a very fast trigger speed can increase battery consumption.
Recovery time, the period before the camera can detect another event, also impacts performance. Balancing these settings is key; a shorter recovery time provides more frequent captures, while a longer time conserves battery life.
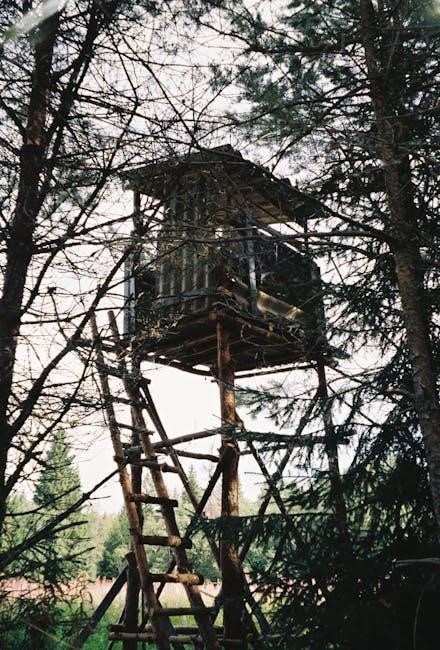
Image Resolution & Video Quality Settings
The Deceptor series offers adjustable image resolution, peaking at 40MP for detailed photographs, and 1440P QHD video recording for clear footage. Higher resolutions and quality settings demand more storage space on your SD card and increase battery drain.
Experiment with different settings to find the optimal balance between image/video clarity and resource consumption. Consider lower resolutions for longer deployments or when storage is limited. Prioritize video quality for capturing movement and behavior, and higher resolution for still images needing detailed analysis.
Cellular Connectivity & Data Transmission
The Stealth Cam Deceptor MAX utilizes cellular connectivity for remote image and video transmission. This model supports dual SIM cards, allowing for network flexibility and redundancy. Ensure a compatible data plan with sufficient bandwidth for your desired transmission frequency.
Data transmission consumes battery power; optimize settings to balance image delivery speed and battery life. Successful data transfer relies on strong cellular signal strength at the camera’s location. Regularly check signal indicators within the camera’s interface.
Network Setup & APN Configuration
Proper network setup is crucial for cellular data transmission. Access the camera’s settings menu to configure the Access Point Name (APN) specific to your cellular carrier. This information, including APN, username, and password, is typically provided by your service provider.
Incorrect APN settings will prevent the camera from connecting to the cellular network. Double-check all entered details for accuracy. The Deceptor MAX supports multiple carriers with appropriate APN configurations. Refer to Stealth Cam’s support resources for a list of pre-configured APN settings.
Data Plan Requirements & Usage
A compatible data plan is essential for the Stealth Cam Deceptor’s cellular functionality. The camera transmits images and videos, consuming data based on resolution and frequency of triggers. Consider a plan with sufficient data allowance to avoid overage charges.
Low-resolution images use less data than high-definition videos. Adjust camera settings to balance image quality and data consumption. Monitor data usage through the Stealth Cam app or your carrier’s portal. A dedicated IoT or trail camera data plan often provides the best value.
Troubleshooting Cellular Connection Issues
If your Stealth Cam Deceptor experiences connectivity problems, verify SIM card insertion and activation with your carrier. Ensure the correct APN settings are configured within the camera’s menu – consult your carrier for these details. Check cellular signal strength at the camera’s location; weak signals cause intermittent connectivity.
Restart the camera and attempt a network rescan. Confirm your data plan is active and has sufficient funds. Obstructions like dense foliage or buildings can interfere with signal reception. Contact Stealth Cam support if issues persist.
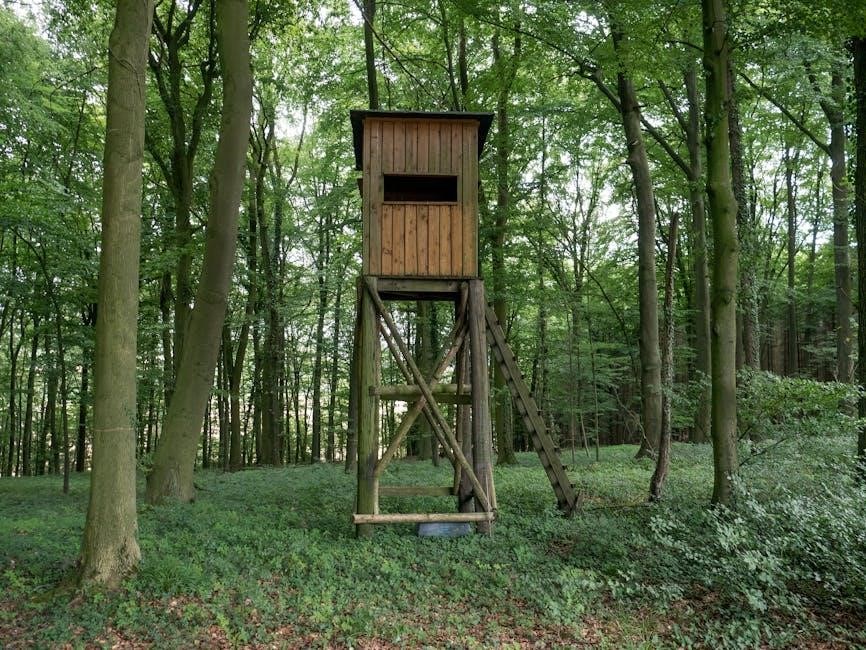
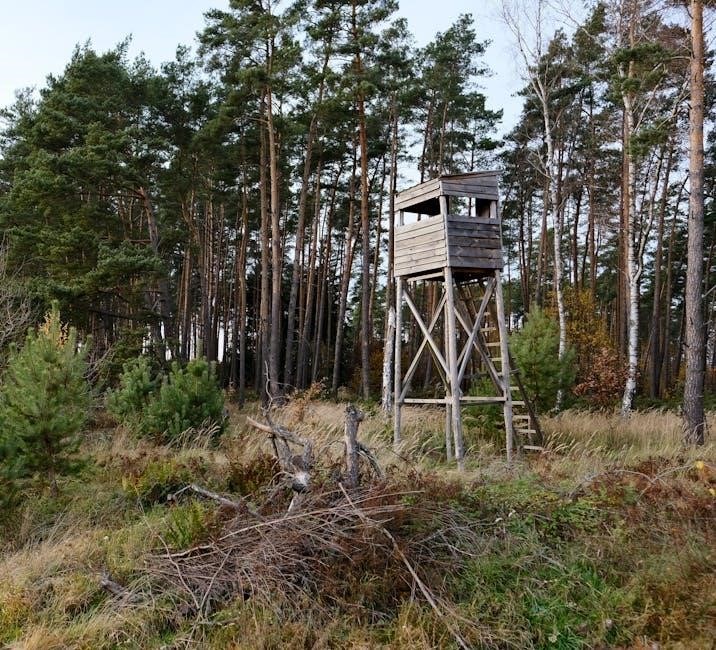
Mounting & Placement Strategies
Securely mount your Stealth Cam Deceptor using the provided straps, ensuring a stable and concealed position. Optimal mounting height is typically 5-10 feet, angled towards anticipated wildlife activity. Wrap straps firmly around a tree or post, utilizing the rear housing strap slots for stability.
Consider prevailing winds and sunlight to minimize image distortion. Camouflage the camera with natural surroundings for discreet operation. Avoid direct sunlight exposure and areas with excessive vegetation movement, which can trigger false alerts.
Optimal Mounting Height & Angle
For best results, mount the Stealth Cam Deceptor between 5 and 10 feet above the ground. This height balances image quality with minimizing obstruction from ground-level vegetation and potential tampering. Angle the camera slightly downwards, approximately 15-20 degrees, to capture a wider field of view.
Adjust the angle based on anticipated animal travel patterns. Consider the camera’s PIR sensor range when determining the optimal angle; ensure the target area is fully within the detection zone. Regularly check and readjust as needed.
Securing the Camera with Straps & Mounts
Utilize the provided strap to securely fasten the Stealth Cam Deceptor to a tree or post. Thread the strap through the designated slots on the rear housing, wrapping it firmly around the mounting surface. Ensure a snug fit, but avoid over-tightening, which could damage the camera or the tree.
Employ a nut and washer to further reinforce the strap connection at the camera’s base. For added security, consider using a commercially available camera mount for enhanced stability and adjustability.

Camouflage & Concealment Techniques
Maintaining a low profile is crucial for successful wildlife observation. Blend your Stealth Cam Deceptor into its surroundings using natural materials like leaves, branches, and moss. Consider the prevailing colors of the environment when choosing camouflage tape or paint.
Avoid placing the camera in direct sunlight or against a brightly colored background, as this can create unwanted reflections. Regularly check the camera’s concealment, as natural elements can shift over time, potentially exposing the device. Prioritize discreet placement for optimal results.
Maintenance & Troubleshooting
Regular maintenance ensures optimal performance of your Stealth Cam Deceptor. Periodically inspect the camera housing for damage and clean the lens with a soft, dry cloth. Check battery levels frequently, especially when utilizing the Sol-Pak solar charger, and address any error codes promptly.
If experiencing connectivity issues, verify SIM card insertion and APN settings. For unresponsive cameras, attempt a reset or consult the troubleshooting section of this manual. Firmware updates, when available, can resolve bugs and enhance functionality.
Battery Management & Solar Pack Usage
Maximize your Stealth Cam’s uptime with effective battery management and Sol-Pak utilization. Regularly check battery levels, especially during periods of low sunlight. The Sol-Pak solar charger provides supplemental power, extending operational life, but requires adequate sun exposure for optimal charging.
In winter, battery performance decreases; consider using lithium batteries for improved cold-weather operation. Monitor the solar pack for obstructions and ensure it’s securely connected. Proper care extends battery life and ensures consistent camera operation.
Common Error Codes & Solutions
Encountering issues? This section details common error codes and their resolutions. “SIM Error” indicates a problem with the SIM card – ensure it’s properly inserted and activated. “SD Card Full” requires clearing space or using a larger capacity card. A “Low Battery” warning necessitates battery replacement or solar pack check.
If the camera freezes, attempt a reset. Consult the full troubleshooting guide for detailed solutions to less frequent errors. Regularly checking for firmware updates can also resolve software-related issues and improve performance.
Firmware Updates & Software Support
Maintaining optimal performance requires regular firmware updates. Check the Stealth Cam website frequently for the latest software releases compatible with your Deceptor model. Updates often include bug fixes, performance enhancements, and new features. Download instructions are provided on the support page.
Software support is available through the online knowledge base and customer service. Ensure your computer meets the minimum system requirements for updating. Following the update process carefully prevents potential issues and ensures continued reliable operation of your camera.
Sol-Pak Solar Battery Pack – Detailed Operation
The Sol-Pak maximizes battery life, providing continuous power to your Deceptor camera. Ensure the solar panel receives direct sunlight for optimal charging; even partial shade reduces efficiency. Regularly inspect the connection between the Sol-Pak and camera, ensuring a secure fit.
The pack stores energy, powering the camera even during periods of low light. Monitor the battery status via the camera’s interface. Proper Sol-Pak usage significantly extends deployment time, minimizing battery changes and maximizing data collection.
Maximizing Solar Charging Efficiency
To achieve peak performance from your Sol-Pak, prioritize panel placement. South-facing exposure (in the Northern Hemisphere) receives the most sunlight throughout the day. Clear any obstructions – branches, leaves – that could create shade. Regularly clean the solar panel surface with a soft cloth to remove dirt and debris.
Angle the panel towards the sun, adjusting seasonally for optimal capture. Consider the sun’s path and potential shading throughout the year. Consistent sunlight translates directly into extended battery life and reliable camera operation.
Troubleshooting Solar Pack Issues
If the Sol-Pak isn’t charging, first verify the panel connection to the camera is secure. Inspect the cable for any visible damage – kinks, cuts, or exposed wires. Ensure the panel receives direct sunlight; shaded conditions drastically reduce charging efficiency. Check the battery terminals for corrosion, cleaning them gently if necessary.
If issues persist, test with a different cable if available. A fully discharged battery may take extended sunlight exposure to initiate charging. Contact Stealth Cam support if problems continue, providing detailed information about the setup and observed behavior.

Winter Operation & Battery Considerations
Cold temperatures significantly reduce battery performance; lithium batteries are recommended for optimal results. Consider using an external battery pack or increasing the Sol-Pak’s exposure to sunlight during shorter winter days. Regularly check battery levels, as cold weather can lead to unexpected shutdowns.
Minimize camera activity during extremely cold periods to conserve power. Snow or ice accumulation on the solar panel will impede charging; clear it promptly. Store batteries in a warm, dry place when not in use to prolong their lifespan.

Safety Precautions & Warranty Information
Always handle the camera and Sol-Pak with care, avoiding dropping or exposing them to extreme conditions. Do not attempt to disassemble or repair the device yourself, as this will void the warranty. Ensure proper mounting to prevent accidental falls.
This Stealth Cam product is covered by a one-year limited warranty against manufacturing defects. Contact customer support at 1-877-269-8490 for warranty claims or assistance. Retain your proof of purchase for warranty service.

Legal Considerations & Wildlife Regulations
Users are responsible for understanding and complying with all local, state, and federal laws regarding trail camera use and wildlife monitoring. Regulations vary significantly by location; check for restrictions on placement, data collection, and potential privacy concerns.
Respect wildlife and their habitat. Avoid disturbing animals or altering their natural behavior. Be mindful of private property rights and obtain necessary permissions before placing cameras on land you do not own. Failure to comply with regulations may result in fines or legal penalties.
Contacting Stealth Cam Customer Support
For assistance with your Stealth Cam Deceptor, our dedicated support team is readily available to address your questions and concerns. You can reach us toll-free at 1-877-269-8490 during regular business hours.
Alternatively, visit our official website for frequently asked questions, detailed troubleshooting guides, and downloadable resources. We strive to provide prompt and effective support to ensure your complete satisfaction with your Stealth Cam product. Please have your model number ready when contacting support for faster service.
Frequently Asked Questions (FAQ)
Q: How do I adjust the PIR sensor range? A: The Deceptor offers variable PIR distance; adjust settings via the control panel to optimize detection. Q: What SIM card size is required? A: The camera utilizes a standard SIM card. Q: How often should I check the Sol-Pak battery? A: Monitor regularly, especially during winter months, to ensure optimal solar charging.
Q: What if my camera isn’t transmitting data? A: Verify APN settings and data plan validity. For further assistance, contact customer support at 1-877-269-8490.