Marie Callender’s Pie Shell Instructions: A Comprehensive Guide
Navigating the world of pie baking is easier with Marie Callender’s! This guide offers detailed instructions, from thawing to baking, ensuring a delightful, golden crust every time, based on recent taste tests.
Understanding Marie Callender’s Pie Shell Options
Marie Callender’s offers a convenient solution for both seasoned bakers and those new to pie-making. Their pie shells come in two primary forms: pre-made, refrigerated shells, and frozen shells. The pre-made options are ready to fill and bake, offering ultimate convenience for a quick dessert. However, the frozen shells provide a longer shelf life and are ideal for planning ahead.
Recent comparisons, like those conducted by Simply Recipes, highlight the brand’s consistent performance in blind taste tests. Understanding these options allows you to choose the shell that best fits your baking schedule and preferences; Whether you need a pie on demand or prefer to stock up for future baking projects, Marie Callender’s provides a versatile range of choices. Considering these factors will help you achieve pie-baking success!
Pre-Made vs. Frozen Pie Shells: Key Differences
The core difference between Marie Callender’s pre-made and frozen pie shells lies in convenience and preparation time. Pre-made shells, found in the refrigerated section, require no thawing – simply fill and bake! This makes them perfect for spontaneous baking or when time is limited. Frozen shells, however, necessitate a thawing period, adding a step to the process.
Taste tests, including evaluations by Simply Recipes, reveal subtle variations in texture. Frozen shells, when properly thawed, can offer a flakier result, while pre-made shells prioritize ease of use. Shelf life is another key distinction; frozen shells boast a significantly longer storage duration. Ultimately, the best choice depends on your immediate needs and desired crust characteristics. Consider your baking style and timeline when selecting between these options.
Marie Callender’s Frozen Pie Shells: Varieties Available
Marie Callender’s offers a diverse selection of frozen pie shells to suit various baking preferences. The standard, deep-dish frozen pie shell is a versatile choice for classic pies like apple or pumpkin. For those seeking a richer flavor, they also provide graham cracker crusts, ideal for cheesecakes and cream pies.
Recent testing, as highlighted in comparative reviews, demonstrates consistency across their offerings. While the deep-dish shell remains the most popular, the graham cracker option provides a delightful alternative. Availability may vary depending on location and retailer, but most major grocery stores carry at least the standard deep-dish variety; Exploring these options allows bakers to create a wide range of desserts with the convenience of a pre-formed crust, ensuring a satisfying result every time.
Preparing to Bake: Essential Tools & Ingredients
Before embarking on your pie-baking journey with Marie Callender’s shells, gather essential tools for success. A reliable baking sheet is crucial to prevent messes and ensure even heat distribution. A fork is needed for crimping the edges, adding a professional touch. Parchment paper can be invaluable for blind baking, preventing sticking and simplifying cleanup.
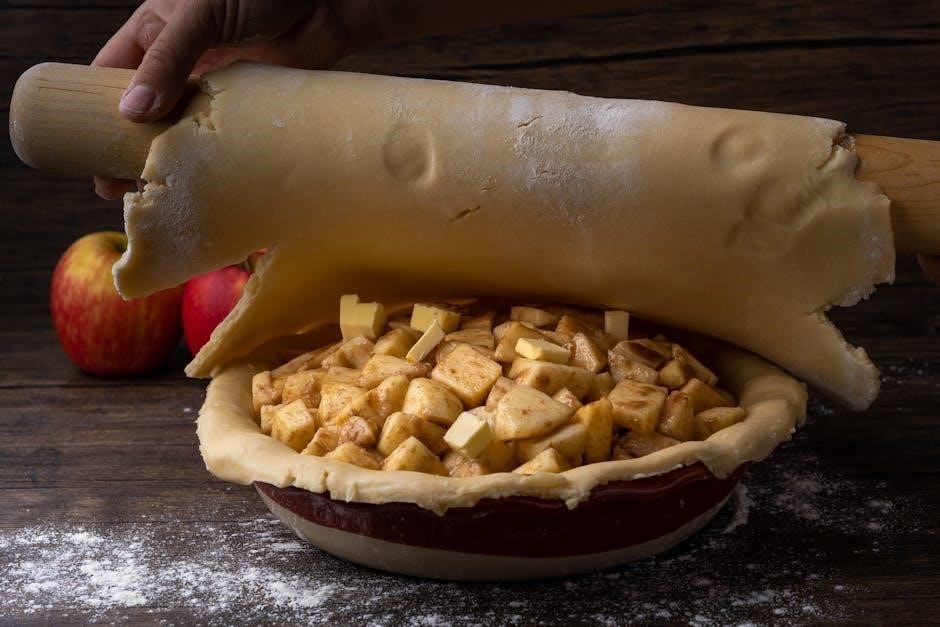
Beyond the shell itself, consider your filling. Depending on your recipe, you’ll likely need ingredients like fruit, sugar, spices, eggs, and thickening agents. Having measuring cups and spoons readily available ensures accuracy. A rolling pin might be useful if you wish to adjust the shell’s edge. Finally, a pie shield or aluminum foil strips are helpful for protecting the crust edges from burning during extended baking times, guaranteeing a perfectly golden finish.
Thawing Instructions: Ensuring Optimal Texture
Achieving a flaky, tender crust begins with proper thawing of your Marie Callender’s frozen pie shell. Rushing this step can lead to a soggy or unevenly baked result. The goal is to gently return the shell to a workable, yet still cool, state without compromising its structural integrity.
Two primary thawing methods are available: room temperature and refrigeration. For optimal results, avoid microwaving, as it can partially cook the shell. Regardless of the method chosen, leave the shell in its original packaging during thawing to protect it from moisture loss. Careful thawing is key to unlocking the full potential of Marie Callender’s quality crust, setting the stage for a truly delicious pie experience.
Room Temperature Thawing Method
For a convenient thawing option, allow the Marie Callender’s frozen pie shell to thaw at room temperature. This method typically takes approximately 60-90 minutes, depending on the ambient temperature. Place the unopened shell on a clean, flat surface, away from direct sunlight or heat sources.
Regularly check the shell’s consistency; it should be pliable but still cool to the touch. Avoid letting it become overly soft or sticky. This method is ideal when you need a relatively quick thawing solution, but remember that maintaining a cool temperature is crucial for preserving the crust’s texture. Once thawed, proceed immediately with filling and baking for best results, ensuring a perfectly flaky pie.
Refrigerator Thawing Method
For optimal results and a more controlled thaw, the refrigerator method is highly recommended. Remove the Marie Callender’s frozen pie shell from its packaging and place it, still in its protective container or wrapped securely in plastic wrap, on a plate or baking sheet within the refrigerator.
Allow the shell to thaw for 2-3 hours, or even overnight for maximum convenience. This slow thawing process helps maintain the crust’s integrity and prevents it from becoming soggy. Once thawed, the shell will be pliable and ready for filling. This method is particularly useful if you’re preparing the pie in advance, allowing for a stress-free baking experience and a consistently delicious outcome.
Baking Instructions: Achieving a Golden Crust
Preheating your oven is crucial for a perfectly baked Marie Callender’s pie shell. Set your oven to 375°F (190°C). Place the thawed or unbaked shell directly onto a baking sheet – this aids in even heat distribution and simplifies cleanup. Bake for 12-15 minutes, or until the crust turns a beautiful golden brown color.
Keep a close watch during the final few minutes to prevent burning, especially around the edges. The crust should be firm to the touch and exhibit a slightly flaky texture. For blind baking (without filling), prick the bottom of the shell several times with a fork to prevent puffing. Allow the baked shell to cool completely before adding your desired filling for the best results and a structurally sound pie.
Blind Baking: Preventing a Soggy Bottom
Achieving a crisp, firm base is vital, especially for pies with wet fillings. Blind baking Marie Callender’s pie shell involves pre-baking the crust before adding the filling. Begin by lining the unbaked shell with parchment paper, ensuring it extends over the edges. Fill the paper with pie weights, dried beans, or rice – this prevents the crust from puffing up during baking.
Bake at 375°F (190°C) for 15-20 minutes with the weights, then carefully remove the paper and weights. Continue baking for another 5-10 minutes, or until the crust is golden brown. This double-bake process creates a sturdy, impermeable layer, effectively combating a soggy bottom and guaranteeing a delightful texture with every slice.
Filling the Pie Shell: Considerations for Different Fillings
Successfully pairing filling with Marie Callender’s shell requires understanding moisture content. Fruit fillings, often containing juices, benefit from a pre-baked or blind-baked crust to prevent sogginess. Ensure the filling isn’t overly liquid; a slight thickening with cornstarch or tapioca can be beneficial. Allow fruit fillings to cool slightly before pouring into the shell, minimizing heat transfer.
Cream fillings, being denser, are more forgiving. However, avoid overfilling, as this can cause spillage during baking. For optimal results, ensure the shell is fully cooled before adding the cream filling. A chilled shell helps set the filling more quickly, creating a cleaner slice. Consider a crumb crust for added texture with cream-based pies.
Baking with Fruit Fillings
When baking with fruit fillings in a Marie Callender’s shell, temperature control is key. Begin baking at a higher temperature (around 425°F/220°C) for the initial 15-20 minutes to set the crust, then reduce the heat to 350°F/175°C for the remainder of the baking time. This prevents a soggy bottom. Monitor the crust’s color closely; if it browns too quickly, shield the edges with foil.
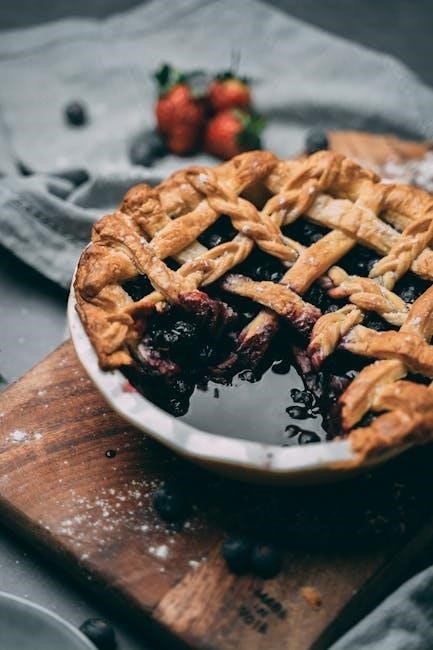
Fruit fillings release juices during baking, so consider a lattice top or vents to allow steam to escape, preventing a bubbling mess. Baking time varies depending on the fruit; apples and peaches typically require 45-60 minutes, while berries may need less. A fully baked pie will have a bubbling, thickened filling and a golden-brown crust. Let cool completely before slicing!
Baking with Cream Fillings
Baking a Marie Callender’s pie shell with cream fillings demands a gentler approach. Lower baking temperatures – around 325°F/160°C – are crucial to prevent curdling or cracking of the custard. Avoid high initial heat, unlike fruit pies, as cream fillings are more delicate. Blind baking the shell beforehand is highly recommended for a crisp base, as cream fillings add significant moisture.
Monitor closely for “set” rather than color. The filling is done when the edges are set but the center still has a slight wobble. Overbaking will result in a dry, cracked custard. Cooling is even more critical with cream pies; allow ample time for complete cooling at room temperature, then refrigerate for several hours to fully set before serving. A chilled pie offers the best texture and flavor!
Troubleshooting Common Issues
Even with careful preparation, pie baking can present challenges. Cracked shells often stem from rapid temperature changes or insufficient moisture in the dough. Prevention involves gentle handling, proper thawing, and potentially brushing with an egg wash before baking. Soggy bottoms are frequently caused by overly wet fillings or insufficient blind baking; pre-baking and using a thickening agent can help.
Burnt edges indicate too high a temperature or prolonged baking. Shielding the edges with foil during the latter part of baking is a simple solution. Remember, every oven varies, so adjust baking times and temperatures accordingly. Don’t hesitate to experiment and observe your pie closely – a little troubleshooting can transform a baking mishap into a delicious success!
Cracked Pie Shells: Causes and Prevention
Cracking in a Marie Callender’s pie shell can be disheartening, but it’s often avoidable. The primary culprit is usually a sudden shift in temperature – placing a frozen shell into a hot oven causes uneven expansion. Insufficient moisture within the dough itself also contributes, making it brittle and prone to fracturing. Overhandling the dough during preparation can also develop gluten, leading to a tougher, more crack-prone crust.
Prevention is key! Ensure the shell is adequately thawed (but not overly so) before baking. Gently prick the bottom with a fork to release steam. Brushing the shell with an egg wash can add elasticity. Bake at a consistent, moderate temperature, and avoid drastic temperature fluctuations. A little care yields a beautifully intact pie shell.
Soggy Pie Shells: Solutions and Techniques
A soggy bottom is a common pie-baking woe, even with convenient Marie Callender’s shells. This typically happens when the filling releases excessive moisture that the crust absorbs before it fully bakes. Insufficient baking time or temperature also contributes, preventing proper crust setting. Using overly wet fillings, particularly fruit fillings, without proper thickening agents exacerbates the problem.
Fortunately, several techniques can combat sogginess! Blind baking the shell – pre-baking it before adding the filling – creates a barrier. Brushing the baked shell with melted chocolate or a thin layer of egg wash seals it. Using a thickening agent like cornstarch or tapioca in fruit fillings minimizes liquid release; Ensure adequate baking time and temperature for a crisp, golden, and delightfully firm crust.
Burnt Pie Shell Edges: How to Avoid Them
Dark, burnt edges on your Marie Callender’s pie shell can detract from an otherwise perfect dessert. This often occurs due to uneven oven temperatures or prolonged baking times. The edges of the pie crust, being thinner, cook faster and are more susceptible to burning than the base. Using a dark-colored baking sheet can also intensify heat absorption, leading to quicker browning and potential burning.
Several preventative measures can ensure a beautifully golden crust. Employing a pie shield – a metal or silicone ring – protects the edges during baking. Lowering the oven temperature slightly and extending the baking time can promote even cooking. Regularly checking the pie during the final stages of baking and covering with foil if needed, prevents over-browning. Rotating the pie halfway through baking also ensures uniform heat distribution.
Storage Instructions: Keeping Leftovers Fresh
Proper storage is crucial for maintaining the quality of leftover Marie Callender’s pie shells, whether baked or unbaked. For unbaked shells, maintaining their frozen state is key; ensure they remain tightly sealed in their original packaging or a freezer-safe bag to prevent freezer burn. Baked shells, however, require a slightly different approach to preserve their texture and flavor.
To store a baked pie shell, allow it to cool completely before wrapping it tightly in plastic wrap, followed by a layer of aluminum foil. This double-layer protection minimizes moisture loss and prevents the crust from becoming stale. Refrigerate for up to three days. For longer storage, freezing is recommended. Wrap the cooled shell securely as described above and freeze for up to two months. Thaw in the refrigerator before using.
Freezing Baked Pie Shells
Extending the life of your beautifully baked Marie Callender’s pie shell is easily achieved through proper freezing techniques. Begin by ensuring the shell is completely cooled to room temperature – this prevents ice crystal formation that can compromise the crust’s texture. Wrap the cooled shell meticulously in several layers of plastic wrap, pressing out any excess air to minimize freezer burn.
For optimal protection, follow the plastic wrap with a layer of heavy-duty aluminum foil. This double barrier safeguards against moisture loss and maintains the shell’s structural integrity. Label the package clearly with the date to track its freshness. Frozen baked shells can be stored for up to two months, maintaining good quality. When ready to use, thaw overnight in the refrigerator before filling and serving.
Marie Callender’s Pie Shells: Nutritional Information
Understanding the nutritional content of Marie Callender’s pie shells allows for informed baking choices. A single shell (approximately 17g) typically contains around 160 calories, with 9g of total fat, including 3g of saturated fat. Cholesterol levels are around 25mg, and sodium content is approximately 140mg per serving.
Carbohydrates contribute about 16g, with 1g of dietary fiber and a small amount of sugar. Protein content is minimal, around 1g per shell. These values can slightly vary depending on the specific variety of Marie Callender’s shell. For individuals monitoring their dietary intake, it’s advisable to consult the packaging for the most accurate and up-to-date nutritional details. Remember to factor in the filling’s nutritional value when calculating the overall pie’s content.
Comparing Marie Callender’s to Other Brands (Pillsbury, Kroger, Trader Joe’s)
Recent blind taste tests reveal interesting distinctions between Marie Callender’s and competitor brands. Pillsbury crusts are often praised for their ease of handling and pristine appearance post-baking, though flavor can be somewhat bland. Kroger’s offerings generally provide a budget-friendly option, but may lack the flakiness of premium brands. Trader Joe’s pie crusts receive mixed reviews, with some appreciating their buttery flavor, while others find them challenging to work with.
Marie Callender’s consistently scores well in taste tests, offering a good balance of flavor and texture. While not always the easiest to unroll, the resulting crust boasts a satisfyingly flaky and buttery profile. Ultimately, the “best” brand depends on individual preferences and baking needs, but Marie Callender’s remains a strong contender for consistently delicious results.